Showing posts with label dessert. Show all posts

Friday, July 5, 2013

Apple Cobbler

Nothing says "All-American" like a nice dutch oven apple cobbler on the Fourth of July--right? 

That's what I told myself at least.  I slightly modified the cobbler topping of Baked Bree, and used delicious apples from our recent field trip to Grandma Hoerners

Apple Cobbler Topping Recipe

1 cup flour
1/4 cup sugar
1/4 cup brown sugar
1/2 teaspoon salt
1 Tablespoon baking powder
6 Tablespoons cold butter
1/4 cup cold water

In a medium bowl, combine the flour, sugars, salt, and baking powder. Cut in the butter using a pastry cutter or a fork. Pour in 1/4 cup cold water. Mix until combined.

Put apples in a dutch oven  (Mine was pre-made, but I would use 4-6 cups of apples, 1-2 T lemon juice, 1/4-1/2 cup of sugar, 1/2 tsp cinnamon, and 1 T starch.) Spread the apples in a dutch oven
Drop cobbler batter on top of apples by the spoonful to resemble cobbles.

Bake in a preheated 375 degree oven for 25 minutes, or until the top is golden brown and the apples are bubbly. Or put lid on dutch oven and bake outside with hot coals until golden brown and bubbly. 

Wednesday, August 22, 2012

Honey-Sweetened Homemade Marshmallows


I adapted my recipe for Marshmallows from the Nourishing Gourmet. I doubled hers, and used the process I was familiar with from my older recipe for marshmallows.  

Honey-Sweetened Homemade Marshmallows
4 packets plain gelatin (a little less than 3 Tbls)
1 cup cold water
1 cup honey
1/4 tsp. salt
1 tsp. vanilla extract

Butter a 9x9 pan. Put 1/2 cup of water in the bowl of a mixer with a whisk , and sprinkle the gelatin over the water. Set aside to soften. (I sprinkle one packet at a time and let it sit in between so it doesn't get clumpy.)

In a small pot, place the honey, salt, and the other 1/2 cup of water. Heat on medium heat. Using a candy thermometer, bring the mixture to 248 degrees. It takes about 7-8 minutes to reach this temperature. Remove from the heat as soon as it’s at the right temperature.

Turn the mixer with the gelatin on low, very slowly pour the hot syrup in a thin stream into the gelatin mixture. Once combined, add the vanilla and increase speed to high. Beat for 10- 15 minutes, or until the mixture is thick and fluffy and cooled down to a lukewarm temperature. Scrape into the prepared pan and leave, uncovered, for at least 4 hours or until set and mostly dry.

Pull the edges away from the side of the pan with a spatula. Sprinkle the top with cocoa powder, toasted coconut, or for classic marshmallows a mixture of half powdered sugar and half corn starch. Flip the pan over on top of a cutting board and let the marshmallow slowly fall out--you can give it a bit of help with the spatula around the edges. Cut into squares and toss in a bowl with your desired coating.

 For S'mores- These did toast up better the next day when they'd dried out for longer, so if you want them for roasting--make at least a day in advance.

Sunday, July 22, 2012

Vanilla Pudding Pops


We love teaching our children that eating real food includes plenty of snacks and treats. Homemade and from whole foods. In our family we love food, and enjoy food. . . and our food is nourishing.


This week we enjoyed a whole food treat of homemade pudding pops. I adapted this Martha Stewart Recipe, swapping out honey for the sugar, and you could use an arrowroot or other starch in place of the corn starch if you wanted as well.

I used an old plastic set of popsicle molds that I've had since I was like 9 or something. But this week I saw these stainless steel popsicle molds, and definitely think those should be a purchase for the future.

Honey Sweetened Vanilla Pudding Pop Recipe

  • 1/4 cup honey
  • 2 Tbl cornstarch or other starch
  • 1 pinch salt
  • 1 1/2 cups whole milk
  • 1 large egg yolk
  • 1 teaspoon pure vanilla extract

In a medium saucepan, off heat, whisk together cornstarch, and salt. Gradually whisk in milk, mixing until ingredients are dissolved. Whisk in egg yolk and honey.
Whisking constantly, cook over medium heat until the first large bubble sputters. Reduce heat to low; continue to whisk, and cook 1 minute. Remove from heat, and immediately pour through a fine-mesh sieve into a bowl; stir in vanilla.
Divide mixture among five or six ice-pop molds. Chill in refrigerator until cool and thickened, about 1 hour. Insert pop sticks, and freeze until solid, at least 4 hours and up to 2 weeks. Run mold briefly under warm water to help release popcicles.

Friday, May 4, 2012

Orange Sheet Cake

I recently made sheet cake for my friends' baby shower.  The co-host made a delicious Texas sheet cake, and I made an orange sheet cake.  And we all ate a slice of each, because --you know-- sheet cake is pretty flat, only like half the thickness of a regular slice of cake.  So a slice of each is really only like having a whole slice of "regular" cake--right?

 I made this orange sheet cake with orange cream cheese Icing from Wilton, but made a few changes.

First, I left out the orange extract, because it's totally not necessary.  That is a typical standard American diet kind of ingredient.  There is fresh orange zest in the cake and frosting, as well as orange juice in the frosting.  That is plenty "orangey" enough.  If you add the extract I'll bet you wouldn't be able to make it through a whole slice because the flavor would become overbearing.  Subtlety is a virtue that a lot of food lacks these days.

Also, the recipe said to bake it in a 9x13 pan.  Obviously that would make a 9x13 cake, not a sheet cake.  Wilton is just trying to advertise one of their pans, but it's a completely wrong opportunity to do so.  I baked this recipe in a half sheet baking sheet.  That's the normal thick jelly roll-type pans that everyone got for wedding gifts from Cosco members. (That's not a dis, I love and use all three I got weekly, and particularly love the two with lids.)

Finally, the recipe for the delicious orange cream cheese frosting makes at least twice as much as you need for a sheet cake.  I can't imagine spreading that much frosting on the smaller 9x13 size cake they suggested baking--it would be half frosting. 

So here are the recipes, with my suggested changes:

Orange Sheet Cake Recipe:

  • 2-1/2 cups all-purpose flour 
  • 2 tablespoons orange zest 
  • 1 tablespoon baking powder 
  • 1/2 teaspoon salt 
  • 3/4 cup (1-1/2 stick) butter, softened 
  • 1-3/4 cup granulated sugar 
  • 3 eggs 
  • 1-1/2 teaspoons pure vanilla extract 
  •  1-1/4 cups buttermilk

Preheat oven to 350°F. Grease sheet pan.


In medium bowl, combine flour, orange zest, baking powder and salt. In large bowl, beat butter with electric mixer until light and fluffy. Add sugar 1/4 cup at a time, scraping down sides of bowl as needed; when combined, beat on medium speed for 2 minutes. Add eggs one at a time, beating well after each addition; add vanilla extract. Add half of flour mixture; beat on low speed until nearly combined. Add buttermilk to moisten; add in remaining flour mixture, beating until just incorporated. Spread batter evenly in pan.

Bake 25-33 minutes, or until a toothpick inserted in center of cake comes out clean. Cool cake in pan completely before icing.

Orange Cream Cheese Frosting Recipe:
  •  1/4cup (1/2 stick) unsalted butter, softened 
  • 1 1/2 8oz packages cream cheese, softened 
  • 1 1/2 tablespoons orange juice 
  • 1 tablespoon orange zest 
  •  2 to 2 1/2  cups confectioners' sugar
In large bowl, beat butter, cream cheese, juice and zest with electric mixer until light and fluffy. Add confectioners' sugar one cup at a time, beating until icing is light and fluffy.

Tuesday, January 10, 2012

Instant Hot Cocoa

I should just restrain myself.  I keep turning over long-enjoyed food products and finding things on the ingredients label I just don't like. Most recently it was hot cocoa mix which contains sucralose.

I'm just not a fan of artificial sweeteners.  They are all created as a sugar alternative to be sweet but to have no (or less) calories.  In the first place I don't believe it is calories per se that are the enemy to good health, and secondly if I wanted to find a replacement for sugar I would go the other direction on the processing spectrum and instead choose to replace it with honey or maple syrup.

So after returning the canister of hot chocolate to the store shelf, we returned home to revisit Alton Brown's "Art of Darkness II: cocoa" to seek out our solution, and were not disappointed.  It's a yummy mug of hot cocoa very rich and dark--very un-American. It's a nice big batch that we can store in a canister for quick and easy use.   A frugal replacement for something fairly overpriced in the store(especially if you buy individual packets) and one in which I can control each of the ingredients. 
 

Homemade Hot Cocoa Mix
  • 2 cups powdered sugar 
  • 1 cup cocoa (Dutch-process preferred) 
  • 2 1/2 cups powdered milk 
  • 1 teaspoon salt 
  • 2 teaspoons cornstarch 
  • 1 pinch cayenne pepper (if you like that kick)

Combine all ingredients in a bowl and sift together (we use a whisk). Seal in an airtight container.

To use, fill your mug one third to half full with the hot cocoa mix and pour in hot water.

Note: LDS Cannery dry milk is a little different than the "instant" powdered milk they sell at the grocery store.  If you are using cannery milk use only 1 1/2 cups dry milk.  Then the amount of mix you'll add to your cup will probably be on the lower end as well.  Just experiment with it--we always do!


Friday, August 26, 2011

Indian Fry Bread

We were looking for a way to enjoy our fresh honey harvest.  We didn't have any bread for toast, but I'm an Arizona girl, and I can't think of anything better to enjoy golden raw honey on than hot fresh Indian fry bread!

When I was little living up in the White Mountains we called them "Navajo Tacos" because the Native Americans would serve the fry bread topped with beans, cheese, lettuce and tomatoes with a dollop of sour cream on top.  They would serve them in the lodge at the ski slopes we went to on the reservation.  After skiing we were always hungry enough for the taco version, but the dessert version of the fry bread with honey drizzled on top can't be beat for a sweet treat.

My mom got her recipe for fry bread from the newspaper in AZ.  Sometimes newspaper recipes can turn out the very best!  This is one of those times.  So here is my mom's Indian Fry Bread Recipe, and.  (Don't forget to follow all hot oil kitchen safety rules--especially with kids around.)   


Indian Fry Bread
Serves 8

4 cups flour
1 Tbl baking powder
1 tsp salt
2 Tbl powdered milk
1 1/4 -1 1/2 cups warm water
Shortening or other frying oil

Melt shortening or other oil in a large skillet, dutch oven,  or wok.  (Should be at least 3/4 inch of oil.)  Heat to 500*F.

Meanwhile, combine flour, baking powder, salt and milk powder in large mixing bowl.  (You can do this by hand or with a dough hook.)  Gradually stir in warm water.  Mix until dough forms a ball and comes clean from edge of bowl.  Knead until elastic.  Divide dough into 8 pieces.  Pat into circles and roll to 1/4 inch thickness.  

Slip one dough circle into hot fat.  Turn once when underside is brown.  Remove from oil, drain on paper towels.  Repeat with remaining dough.

Friday, June 17, 2011

Orange Sherbet

Owen has been obsessed with an idea lately.  We try to encourage any interest the boys show towards food or cooking and Owen was obsessed with making homemade orange sherbet.  We watched Alton Brown make it on Good Eats and since then Owen asked about it almost daily.

I cannot even describe how delicious it turned out.  It tastes so orange and the flavor is so clear.  As I was eating it I was thinking about how so many people and us included just don't even know what the "real thing" tastes like.  And I wondered if we sat a bunch of people down in a room and fed them the real thing if they wouldn't just instantly be converted to real food because they simply hadn't known what they had been missing?

Unfortunately for some people their taste buds have been assaulted with too much added salt, and too much added sugar, and too many artificial "natural flavorings"  for so long they can overlook real food upon first re-taste.   But I've seen my homemade chocolate pudding rock people's worlds before, and I'm going to bet that this orange sherbet would do the same.

It sure rocked mine.
Orange Sherbet Recipe

7 ounces sugar
1 1/2 tablespoons finely grated orange zest
1/4 teaspoon kosher salt
2 cups freshly squeezed orange juice, (2 to 3 pounds oranges)
1 tablespoon freshly squeezed lemon juice
1 teaspoon vanilla extract
1 1/2 cups very cold whole milk

In the bowl of a food processor combine all of the ingredients except the milk and process until the sugar is dissolved, approximately 1 minute. Transfer the mixture to a mixing bowl and whisk in the milk. Cover the bowl and place in the refrigerator until the mixture reaches 40 degrees F or below, approximately 1 hour. Pour the mixture into an ice cream maker and process until it is the consistency of soft serve ice cream. You may serve now or transfer to a lidded container and place in freezer until firm, approximately 3 hours.

SERVES 8 (1/2 cup serving);

Tuesday, November 30, 2010

Cranberry Meringue Pie

 I made this cranberry meringue pie for Thanksgiving dinner.  I love this recipe because we are used to lemon meringue pies, so substituting the lemon for a different sour, tart fruit is a really clever idea that actually translated into a good thing.

 It's a Martha Stewart Recipe for mini pies that I modified into a full pie recipe.

 So delicious. . almost makes you want to eat more cranberries.  Yes, there will be more cranberries.

Cranberry Meringue Pie
(overnight for best results)

1 pie crust dough
3 1/4 cups fresh cranberries (12 ounces)
1 1/2 cups sugar
1 1/2 teaspoons finely chopped blood orange zest, plus 1/4 cup blood orange juice (Can use any kind of orange)
1/4 teaspoon salt
1/8 teaspoon ground cinnamon
Pinch of ground cloves
4 tablespoons cornstarch
3 large egg whites
Pinch of cream of tartar
Preheat oven to 375 degrees. 
 
On a lightly floured surface, roll out pie dough to 1/8 inch thick. Place in a deep 9-inch pie plate. Pierce bottom with tines of a fork. Freeze 15 minutes.  Line shell with parchment paper, and fill with pie weights or dried beans. Bake 15 minutes. Remove weights and parchment. Return to oven; bake until bottom is just turning golden, 5 minutes more. Transfer to wire rack; let cool 5 minutes. Remove shells from tin; let cool completely.
 
Bring 2 cups cranberries, 1 cup sugar, and 1 1/2 cups water to a boil in a medium saucepan. Reduce heat, and simmer mixture, stirring occasionally, until cranberries have burst, about 5 minutes. Pour through a coarse sieve, then a fine sieve; discard solids. (You should have about 1 3/4 cups; if you have less, add water).

Bring strained cranberry juice, 1/4 cup sugar, the zests, salt, cinnamon, cloves, and remaining 1 1/4 cups cranberries to a boil in a medium saucepan, stirring occasionally. Reduce heat; simmer, stirring occasionally, until cranberries are soft but have not burst, about 3 minutes.

Meanwhile, stir cornstarch, blood orange juice, and 1/4 cup water in a bowl; whisk into cranberry mixture. Bring to a boil, stirring constantly. Cook, stirring, until translucent, about 1 minute. into pie shell. Refrigerate until set, a few hours to overnight.
 
Preheat broiler. Put egg whites and remaining 1/4 cup sugar into the heatproof bowl of an electric mixer set over a pan of simmering water; whisk until sugar has dissolved and mixture is hot to the touch. Attach to mixer fitted with the whisk attachment; beat on medium speed until foamy. Raise speed to high. Add cream of tartar; beat until medium, glossy peaks form. Spread meringue on pie.
Set pie under broiler until top is browned, 30 seconds to 1 minute.

Monday, September 20, 2010

Key Lime Brownies

Jeremy won the contest for the most unusual brownies at our Church Labor Day picnic. 

 
That's brownies with a layer of lime curd topped with a layer of chocolate ganache.

Ganache is just cream and chocolate.  Heat up one part heavy cream until it starts to get steamy.  Pour over three parts chopped semi-sweet chocolate in a glass bowl.  Let sit until chocolate melts, stir to incorporate.  Pour over top of cake or brownies.
I have to add here that Jeremy sent me into the store for lemon curd, and I came out with a jar of lemon and a jar of lime.  Not that I'm claiming Jeremy's victory for the most unusual brownies, I just was pretty sure that if he was there looking at the selection that he would choose the lime.  So I guess I'm just saying I know my husband. . . and I can hold my own in the kitchen stadium.(And yes, that picture is the brand we get--though it's not really so hyper-colored.)

And here is the Brownie Recipe:


1/2 cup butter
1/2 cup unsweetened cocoa powder
2 cups white sugar
4 eggs
2 tsp vanilla

1 1/2 cups all-purpose flour

1/4 teaspoon salt

Preheat the oven to 350 degrees F.  Prepare a 9x13 inch pan.

In medium saucepan over medium heat, melt butter. Remove from heat and immediately stir in the cocoa. In a large bowl, beat together the sugar and eggs. Add vanilla and stir in the melted chocolate mixture. Combine the flour and salt; stir into the batter just until combined. Spread evenly into the prepared pan.

Bake for 30 to 40 minutes in the preheated oven, or until the top has crusted over.

Thursday, August 5, 2010

Lemon Basil Ice Cream

Basil is one of the fragrant joys of summer time. When I saw this recipe for lemon basil ice cream I was intrigued,and knew I had to find the opportunity to make it.

The ice cream did not disappoint, with clean crisp flavors, and creamy texture. It's a new favorite.

2 c. milk
1 bunch basil
3/4 cup sugar
1 cup heavy cream
2 lemons (zest only)

Simmer the milk with the basil over low heat until the basil leaves wilt and turn brown. Remove from heat and strain the milk removing the basil. Mix in the sugar while the milk is still warm and then refrigerate this mixture for 2 hours, or until chilled.

Put the milk and cream in the freezer for about 10 minutes so it will be ice cold for freezing. Zest the two lemons and mix with the basil-infused milk and the creamt. Pour the mixture into the bowl of the ice cream maker. Freeze according to your machine's directions.

Thursday, February 11, 2010

Sugar Cookies with Frosting

Though sugar-cookies and frosting are definitely junk food--it still infinitely better to make them from scratch both for the body, and for the children.


Owen wanted to have a cookie-decorating party and invite friends.  I said, "yes".


We had about a billion heart-shaped cookies (and a nice selection of rocket ships and rabbits and other random shapes Owen wanted) white, pink, and purple frosting, lots of toppings and sprinkles.


Shake, shake shake--who needs some sprinkles?


The cookies were eaten as fast as they were decorated.

"Bulk" Sugar Cookies-
Makes: a billion

2 C (1 lb) butter
2 C sugar
3 eggs
2 tsp vanilla
1 tsp lemon or almond extract
1 t. baking soda
6-7 C flour

Cream butter and sugar. Beat in eggs and extracts until light and fluffy. Add the baking soda in with a few cups of the flour into the egg mixture. Gradually stir remaining flour. The recipe called for 6 cups flour, I used at least 6 and a half. There just can be more variation with large recipes. The dough will be really soft still, but should hold together (it hardens when you chill it).

Divide dough into four portions. Wrap in plastic. If you are going to roll the dough for shaped cookies mush it into a disk-shape on the plastic wrap, that way the rolling is already started. You can also shape this into logs and do slice and bake cookies with it. Chill dough at least an hour. Or wrap again in foil and freeze up to three months. (We froze one of the four portions.)

Double Batch of Buttercream Frosting-
Makes: enough to frost the billion cookies

1 cup (1/2 lb) butter
1 cup vegetable shortening
2 Tbl milk
2 tsp vanilla
2 lb bag of powdered sugar

Cream the butter and shortening together. Add milk and vanilla. Slowly add powdered sugar. (I draped a kitchen towel over my mixer as a hood and still got sugar everywhere!) Add colorings-use less milk if you are going to use liquid food color.

Friday, December 18, 2009

Homemade Marshmallows


Jeremy has an awesome vintage 70's cookbook with all kinds of crazy recipes.  I've made these homemade marshmallows quite a few times.  

**FYI: This recipe contains corn syrup or glucose, which is an industrial product but is not synonymous with high-fructose corn syrup.  Corn syrup is very helpful in many kinds of home candy making as it helps prevent the super-saturated sucrose (granulated sugar) solution from bunching up and crystallizing by literally getting "in the way" of the sucrose molecules.  (Thank you Alton Brown.)

This recipe takes 5 hours and a candy thermometer.

Ingredients:
water
2 envelopes unflavored (Knox)gelatin
2 cups sugar
1/2 cup light corn syrup**
2 tsp vanilla extract
1 Tbl powdered sugar
1 Tbl corn starch

Directions: Lightly butter a 9x13 pan.

In a small saucepan pour in 2/3 cup water, sprinkle gelatin over the top. Set saucepan over low heat and stir until gelatin dissolves.

Heat sugar, corn syrup, and 1/2 cup hot water in a 2-qt. saucepan. Stir until mixture comes to a boil, then cover and cook 5 min. (Important to remove sugar crystals.) Then set candy thermometer in place. Boil without stirring. Occasionally wash down the sides of the pan with a pasty brush dipped in water to remove crystals.

Right before mixture reaches firm ball stage (248 degrees F.) place gelatin mixture in the bowl of your mixer. (If it has gelled already just slightly reheat it to loosen the gel.)

When the syrup reaches 248 remove from heat and immediately pour syrup in a fine stream into gelatin with the mixer running on high.

Beat constantly until thick and lukewarm (about 20 minutes) then blend in vanilla.

Turn marshmallow mixture into buttered pan, smoothing the top with a spatula. Let stand uncovered in a cool-ish place on a cooling rack until completely cool and set (about 4 hours).

Combine powdered sugar and corn starch and sift over top of cooled marshmallows. Run a spatula around the sides of pan and invert on a cutting board.

Cut marshmallows into squares using a knife dipped in warm water. Immediately roll marshmallows in more sugar/corn starch.
You can allow to set overnight- or eat them right away--enjoy!

Monday, August 10, 2009

Sourdough Doughnuts

Owen's been asking us to make doughnuts for the last couple of weeks. Fortunate or unfortunate as it may be Owen is now to the age where he actually remembers things we say to him from day to day or week to week. So when we as his lazy parents say "not today Owen, maybe next week. . ." he remembers, and holds us to our word.

Saturday Jeremy was out for the morning on site at a schoolyard garden, so I decided it was as decent a time as any to go ahead and make doughnuts. We've made them before with a recipe that has given us great results. I decided to try a new recipe this time; however, as I'm on a sourdough kick.

It's a fun process and very fulfilling to create something at home that most people only buy in stores.
Rising.

Frying.

Draining and Cooling

Rolling in cinnamon sugar and serving.

We were deliciously impressed with the sourdough doughnuts. They were more dense than commercial yeast doughnuts--they were more like cake doughnuts. And as with most baked goods they're best eaten the same day. So we made a few trips to share some of the goodness with friends, but it didn't keep us from devouring much more than our own fair share!

Sourdough doughnuts

¼ cup Milk
1 cup Sourdough starter
2 Eggs, beaten
¼ cup Oil
⅔ cup Sugar
½ teaspoon Salt
¼ teaspoon Nutmeg
½ teaspoon Baking soda
3½ cup Flour
½ teaspoon Cinnamon
1 teaspoons Baking powder
1 teaspoon Vanilla

Mix sourdough starter with soda in large bowl. Add milk, sugar, eggs, oil, flour, vanilla, baking powder and spices. Mix well, shape into ball, cover for one hour. Roll out onto a well floured surface to 1/2 inch thick. Cut doughnuts with biscuit cutter. Let sit one hour. Fry in 350-375* oil until golden brown. Turn once when you can see the color coming up the middle of the doughnut. Drain on a cooling rack over a paper towel. Roll in cinnamon-sugar. These are best eaten the same day you make them.

Friday, August 7, 2009

Chocolate Hazelnut Pie

(Alternately: Homemade Chocolate Pudding --the chocolate filling for this pie is also my recipe for homemade chocolate pudding.)

Today is my next installment of the "You want pies with that?" challenge. I never mentioned, but my first attempt last month tied for first place! That's why I love my internet friends--they make me feel good about myself. I tied with Mary's Blueberry Hand Pies, an association I'm proud of since I voted for her! We won the opportunity to name the next challenge- it's gonna be good, but you'll have to wait and see! This month the challenge was named by someone else, and it was to create a pie starring nuts.


The nut that fills some great memories of mine is the hazelnut. Beginning with when my family lived in Germany and we discovered the delicious hazelnut and cocoa spread called Nutella. This began my love for hazelnuts. When I returned to study abroad in Vienna I enjoyed the locally produced Manner Schnitten-- waffle wafers filled with a hazelnut creme. But my favorite thing to do was walk down Kartner Strasse in the afternoon following classes and treat myself to creamy hazelnut ice cream cone.

"Ein Kugel Haselnuss, bitte." I'd say and pay my 2 Euros.

So picking my nut of choice for this challenge was--really--a simple task. I searched around a bit and in the end came up with a pie that is a bit of this, a bit of that, but altogether delicious.

Going with the classic hazelnut pairing with chocolate, here is my:

Chocolate Hazelnut Pie
--A chocolate pie in a hazelnut-graham cracker pie crust, topped with hazelnut-coca whipped cream and sprinkled with chopped hazelnuts--


Crust recipe:
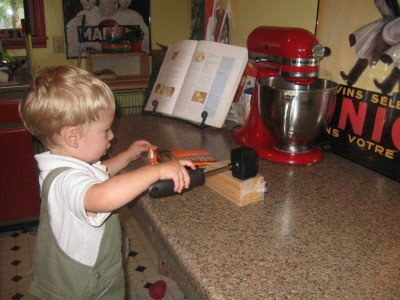
1 1/4 cups graham cracker crumbs (I put the "kitchen elves" in charge of that one)
1/4 cup finely chopped hazelnuts
1/4 cup brown sugar
6 Tbl butter, melted

Combine dry ingredients, stir in the butter, and press into pie plate. Bake at 350* for seven minutes.

Chocolate cream filling recipe:
2 ounces/squares unsweetened chocolate
1 1/2 cups milk
2/3 cup Sugar
1/4 cup flour
1/4 tsp salt
1/2 cup cold milk
3 egg yolks, slightly beaten
2 Tbls butter
2 tsp vanilla

Begin by finely chopping or grating 2 squares of unsweetened chocolate. This means two whole individually wrapped squares, not just square segments. Place this in a small saucepan and pour 1 1/2 cups milk over it. Heat slowly to scald milk and melt chocolate.

In a medium saucepan combine sugar, flour, and salt. Slowly pour in 1/2 cup of cold milk and mix to combine. Pour in the melted chocolate and scalded milk. Bring quickly to a boil, reduce the heat and cook for three minutes.

Temper the egg yolks adding small spoonfuls of the hot liquid to the yolks while stirring quickly. When you've at least doubled the volume of the egg yolk mixture add back into the saucepan. Cook for three minutes. Stirring constantly.

Remove from heat, stir in butter and vanilla and allow to cool to lukewarm. Spoon filling into pie crust and place in refrigerator to cool completely.


Whipped cream recipe:

1/2 cup heavy whipping cream
1 heaping tablespoon "Nutella" hazelnut-cocoa spread

Beat the heavy cream to soft peaks, add the Nutella for sweetness and flavor and beat until stiff peaks form.

Spoon cream on top of pie filling, sprinkle with chopped hazelnuts and garnish with a piece of hazelnut chocolate.

Enjoy!

Tuesday, June 30, 2009

Berry Patch Ice Cream Dessert

I hosted book club last night. I had a really hard time trying to figure out what I was in the "mood" to make, and finally settled on something I had pulled from a magazine a few years ago. It was perfect for a summer evening get together.

Berry Patch Ice Cream Dessert
From Better homes and Garden August 2001 (I honestly don't know how I have something saved from way back then.)

Begin by baking a batch of brownies. (I'll post Kara's world-famous brownie recipe another day.) Divide the batter into two 8-inch rounds lined with parchment for easy removal. The instructions say to wrap one of them up and freeze for later use--in my case I fed it to the boys of the house because I wasn't going to be sharing any of the finished product with them!

Scoop 1 to 1 1/2 quarts vanilla ice cream in the bowl of a mixer.

Beat just until smooth.

Fold in 1 cup of mixed berries. Spoon into a 8-inch round lined with plastic wrap. (I used a springform pan so I could get it out easily.) Freeze for at least 4 hours.

To serve place brownie round on a plate. Lift ice cream and plastic wrap from pan (or remove springform side). Invert ice cream on brownie. Peel off plastic wrap. Top with 1 1/2 cups berries. Let dessert stand at room temperature 10-15 minutes before serving.

Slice into wedges like a pie, and--if you like--serve with raspberry or chocolate syrup to drizzle.

Sunday, June 28, 2009

Lemonade Stand Pie

I made a pie this weekend as a part of the "You Want Pies With That?" challenge. The theme for this month a Taste of Summer pie. I decided that nothing reminds me of those idyllic summer days than a good old fashioned lemonade stand. One that is run by a blond little girl wearing gingham and pigtails. And there is a sprinkler running on the lawn behind her. And some other neighborhood kids are playing with sidewalk chalk and jump ropes nearby. . .

So wrapping all those images into one delicious bite. . . here is my Lemonade Stand Pie


This recipe is adapted from Martha.

Wash a lemon and cut crosswise into thin slices using a mandoline. Remove any seeds and discard. Remove peel and pith of 2 more lemons and discard. Slice lemon flesh crosswise into very thin slices. Remove seeds and discard; add to a bowl with other lemon slices. Add 3 cups sugar and toss well to coat. Cover bowl with plastic wrap, and let mixture stand overnight, stirring occasionally.


The next day, make a double pie crust recipe of your choice, adding in 2 tablespoons lemon zest.

Preheat oven to 450 degrees. On a lightly floured work surface, roll 1 piece of crust into a 13-inch round. Fit dough into a 10-inch pie plate, pressing it into the edges; refrigerate 15 minutes.

Add 1/8 teaspoon salt and 7 whole eggs to lemon mixture; stir until well combined. Pour into chilled pie crust.

On a lightly floured work surface, roll remaining piece of crust into a 13-inch round. Slice vents liberally into the crust. Place over filling and crimp edges to seal. Brush top of crust with 1 egg white.

Transfer pie to oven and bake 15 minutes. Reduce oven temperature to 375 degrees and continue until crust is golden brown and shiny, about 30 minutes.


This pie has a lemony custard-like filling that is very powerfully lemon. It's not sour or tart, but simply lemon. And simply delicious to those that are a fan!

Lemonade Stand Pie

3 lemons
3 cups sugar
1/8 tsp salt
7 eggs
double pie crust

Wash a lemon and cut crosswise into thin slices using a mandoline. Remove any seeds and discard.  Remove peel and pith of 2 more lemons and discard (Reserve 2 tablespoons of zest for crust). Slice lemon flesh crosswise into very thin slices. Remove seeds and discard; add to a bowl with other lemon slices. Add 3 cups sugar and toss well to coat. Cover bowl with plastic wrap, and let mixture stand overnight, stirring occasionally.

The next day, make a double pie crust recipe of your choice, adding in 2 tablespoons lemon zest.

Preheat oven to 450 degrees. On a lightly floured work surface, roll 1 piece of crust into a 13-inch round. Fit dough into a 10-inch pie plate, pressing it into the edges; refrigerate 15 minutes.

Add 1/8 teaspoon salt and 7 whole eggs to lemon mixture; stir until well combined. Pour into chilled pie crust.

On a lightly floured work surface, roll remaining piece of crust into a 13-inch round. Slice vents liberally into the crust. Place over filling and crimp edges to seal. Brush top of crust with 1 egg white.

Transfer pie to oven and bake 15 minutes. Reduce oven temperature to 375 degrees and continue until crust is golden brown and shiny, about 30 minutes.

Enjoy!

Thursday, October 23, 2008

Pumpkin Dip and Halloween Boo-fay


Here was my spread for the Book Club I hosted this month! I love fall food, and treats! The punch was a 2-liter of Sprite, a pint of raspberry sherbet, and half a bag of frozen raspberries--standard, but delicious!

I served delicious pumpkin bars. There are many good recipes for pumpkin bars, I'm sure you have your favorite. I used the Better Homes and Gardens Cookbook recipe. And of course, the best thing about it is the cream cheese frosting! Yum....


This great pumpkin dip is from Taste of Home a few years back. In a large mixing bowl beat one 8-oz package of cream cheese with 2 cups powdered Sugar. Add one 15oz can of pureed pumpkin, 3 tsp pumpkin pie spice, and 1 tsp vanilla. It is delicious with apple and pear slices.


This witches cauldron in the fire pit is my favorite aesthetically speaking. Pretzel rods and three colors of delicious sweet peppers make up the fire. The dip is a sour cream onion dip. I bought mine pre-made (there's only so many hours in the day). I looked for a little cauldron bowl for the dip to go in, but alas, I had to settle for a dark bowl, I still think the effect is really nice.
Happy Halloween Treating!